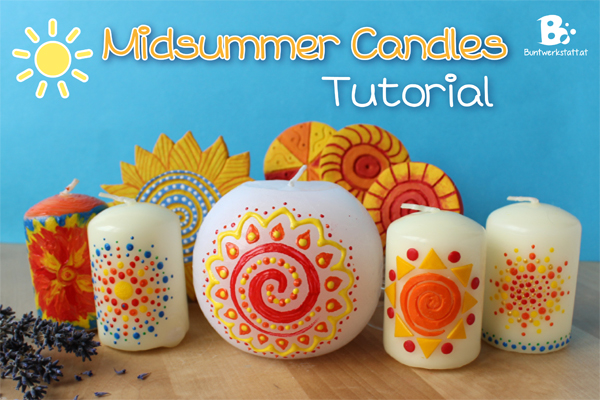
Today on the 21th of June is the summer solstice or midsummer. Many people in Europe celebrate the longest day and the shortest night of the year with large bonfires. I was inspired to make some summery crafts and wanted to show you how you can decorate these Midsummer Candles!

I used plain white candles, because the colors will show up nicely on them. To decorate them I used some wax sheets (available here*) and special candle paints. (available here*)
I have also done a tutorial for the sun discs you can see in the picture above behind the candles. You can find it here: Sun Discs made of Air Drying Clay.
How it’s done:

For the big round candle, I used solely candle paint (available here*) You can paint directly from the tube, or use a paint brush. The consistency is similar to window colors. You can mix the colors and clean your brush with water afterwards. Nevertheless I would recommend using an old paint brush. The bristles should be soft, otherwise you will get a streaky result.
The candle paint will need about half a day to dry. If you want do decorate your candle all around, you have to take care not to mess it up. You can correct little mistakes easily with a tooth pick or a cotton bud.
The application directly from the tube is amazingly easy. Practice just a little on a sheet of paper bevor you start on the candle. To cover bigger areas, use a sponge. The candle paint is also suitable for crafting with kids.
Just take care not to shake the pen. If there are air bubbles in the paint, you can make accidental splotches.
Wax sheets (available here*) are a really fun and easy way to decorate candles. I decided on a simple motiv and put the pieces in a mosaic-like fashion on my candle. You can use a toothpick to carve out the shape that you want in the wax sheet. For sharp edges and fine lines I used a small cutter. Also small cookie cutters work really well! For the little circles I used the plastic thing that covers the bristles on a new brush. A straw would work as well.
The wax sheets stix on the candle by themselves if you warm them up a little between your hands.
If you are not good at painting, you can try to make little dots instead of lines. You will get awesome results, even if your motives are a little uneven. Just start from the middle and work your way out. It’s really addictive! 🙂
Follow us on Instagram for exclusive tutorials, creative ideas and behind the scences pics: ColorfulCraftsDIY on Instagram
*This blog post contains affiliate links. You can read all about them on my disclosure page. Link >>
Invalid Displayed Gallery


